How dental hygienists are fitting intraoral scans into their (already packed) hygiene appointments
Are dental hygienists’ appointment windows shrinking? In a way, yes.
When you consider the multiple ad hoc requests that can arise combined with the growing trend toward accelerated and assisted hygiene, that appointment window can start to feel smaller and smaller.1
Your top priority is giving your patients the best care you can give—and now with every new technological advancement, it seems you’re given ways to do just that. Except that also gives you even more to squeeze into that already small appointment window.
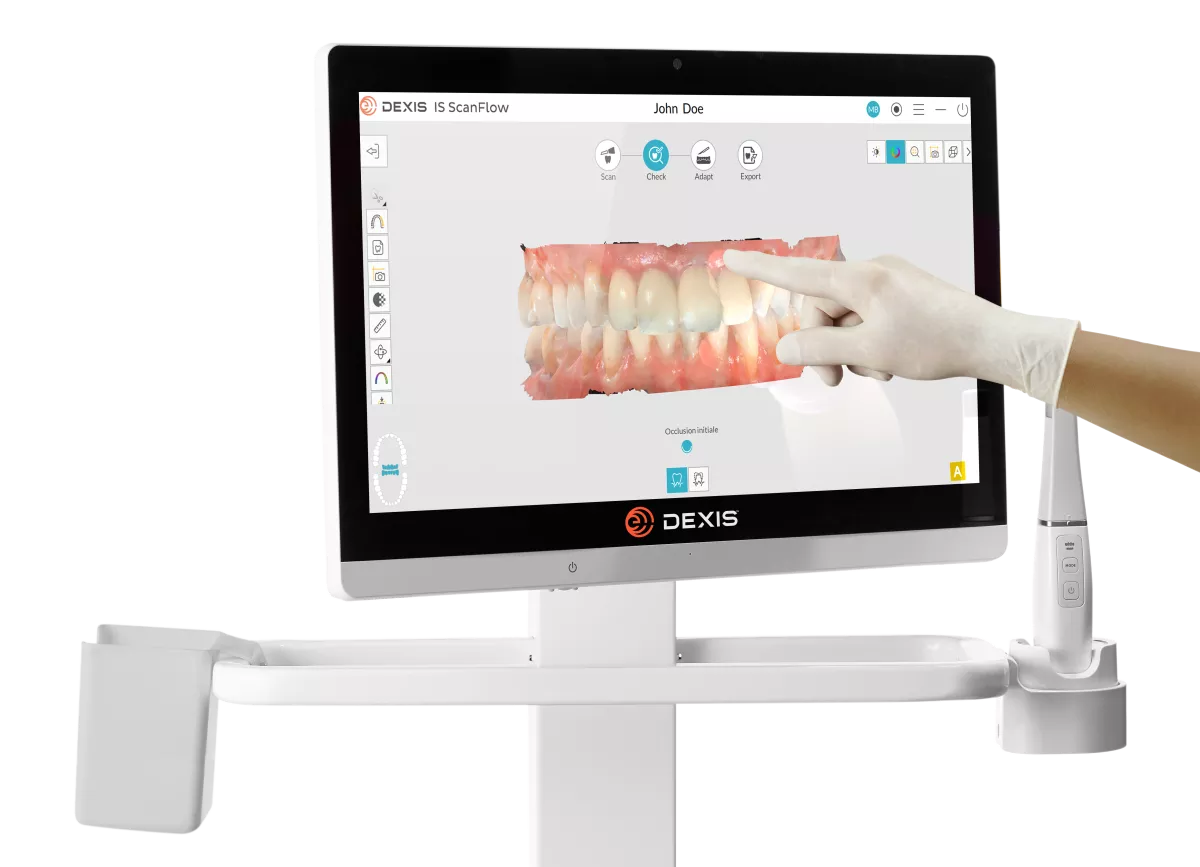
One of the more recent additions to dental hygiene appointments is the use of an intraoral scanner to acquire digital impressions.
A digital impression is a highly accurate 3D image of your patient’s dentition. Itcan be used in all kinds of fantastic ways like patient education, treatment simulations, treatment planning and more.
But while the benefits are clear, the problem still stands: how do you fit another process into your appointment block?
The good news: acquiring a digital impression can be like second nature if you put into practice and use the right techniques.
Here are 8 tips to make your intraoral scanning process quick and easy.
1. The dental hygienists’ 30–60-minute appointment window
Hygiene appointments can be unpredictable. All kinds of unexpected challenges can arise including talkative patients, sudden emergencies, restless children, the need for extensive cleaning, and the introduction of new procedures.
In fact, it can make it very tempting to skip the most crucial element to an efficient appointment: communication.
A lack of communication can cause high anxiety and with high anxiety can come a lot of questions. Get out in front of it by putting your patients at ease from the start.
Show them your intraoral scanner and explain that it is a 3D camera that you will place along their teeth to collect a series of images. Let them know how long they will be expected to hold their mouth open and reassure them that no radiation is produced.
2. While capturing your intraoral scan, position your computer for easy viewing
Having to crane your neck or work around blocked visibility is a sure way to slow yourself down.
3. Keep your patient’s mouth dry
Ask the patient to swallow and/or blow air onto the teeth.
4. Smooth is fast
Smooth, continuous movements allow the computer to mesh scan data without getting lost, saving you time.
5. Do not over scan your patient’s mouth
Once you capture an area, move on to the next.
6. Holes and voids in your intraoral scan are okay
If they are not in critical areas affecting the final restoration or the buccal surface as it is needed to capture the bite registration.
7. Multitask while your intraoral scan is processing
Use those few seconds to wipe down and clean up the screen you’ll be using to show the final scan to your patient.
8. Educate your patients
One of the great things about an intraoral scan is that you are finally able to show your patient what you have been able to see all along.
For instance, instead of trying to explain the need for fluoride treatment, show your patient the demineralized tooth enamel and explain how the fluoride will help rebuild the weakened tooth enamel.
If you’re trying to explain the need for scaling and root planing, you can show the patient the plaque and calculus buildup as well as the periodontal pocket (bonus points for showing her a previous scan from before her recession!)
An intraoral scanner can do fantastic things for your practice and patients. Instead of dreading a new process, use these tips to make the experience smooth and beneficial for you, your clinician(s), and your patients.
Click below to talk to your local DEXIS™ representative about the DEXIS IS 3800W — the simple yet powerful wireless intraoral scanner from DEXIS.


